Export to CSV
QuickPlanX offers the capability to export your projects to CSV files, allowing you to share or print your projects easily. This guide will walk you through the steps to export either the entire project or a specific branch as a CSV document.
Export Entire Project
-
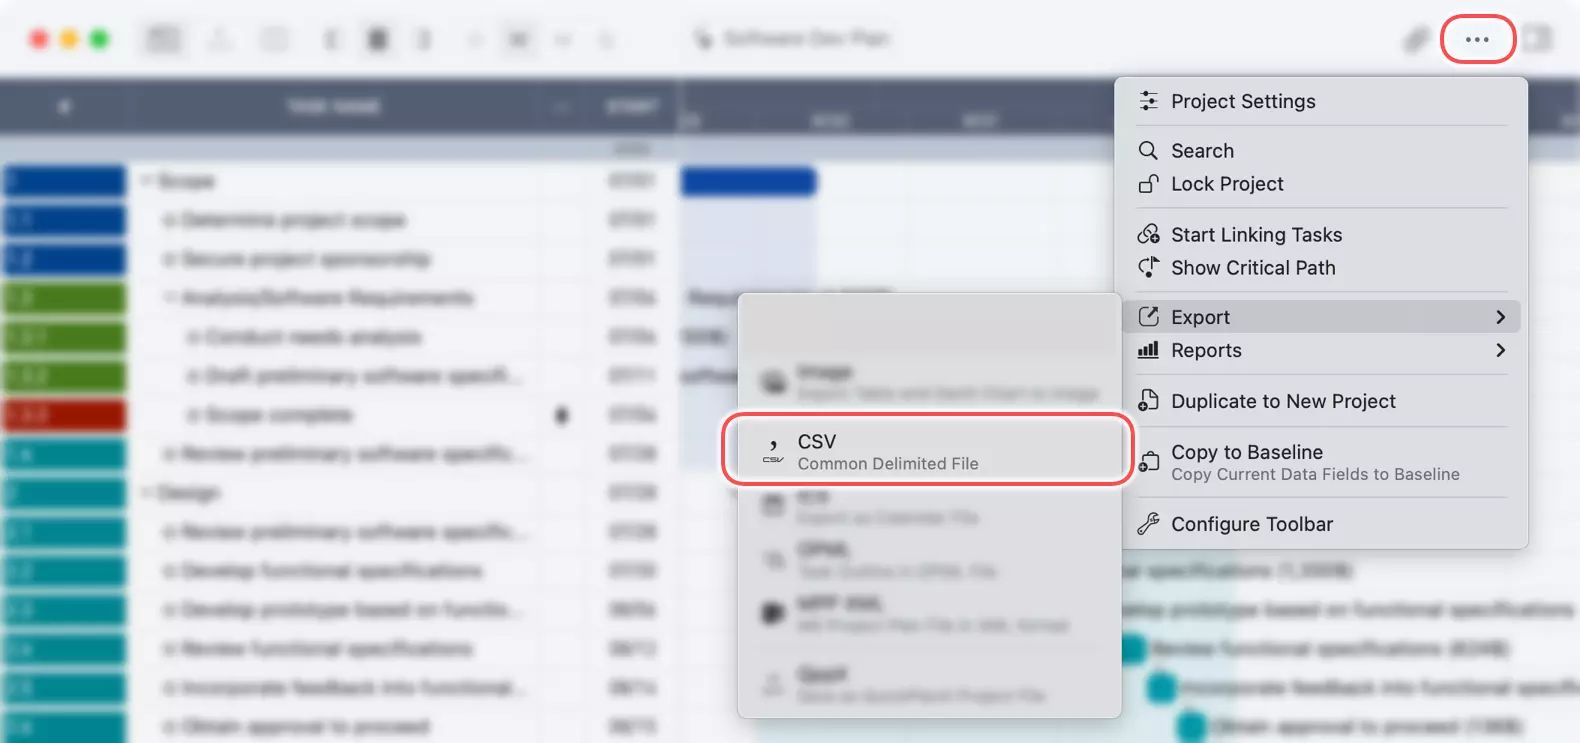
Tap the
···button located at the top-right corner of the toolbar to access the export menu. -
Select
Export→CSVfrom the menu options.Customize ToolbarYou can customize the toolbar to include the Export → CSV button for quicker access. Learn how to customize the toolbar display.
-
Configure Export Options
Choose the columns and content you want to include in the exported CSV file. You can select as many or as few columns as needed. The app will automatically generate the CSV file and display a preview in the right panel of the export dialog.

Once you've exported the project, you can save the CSV file to your device.
Export a Specific Branch
On Mac
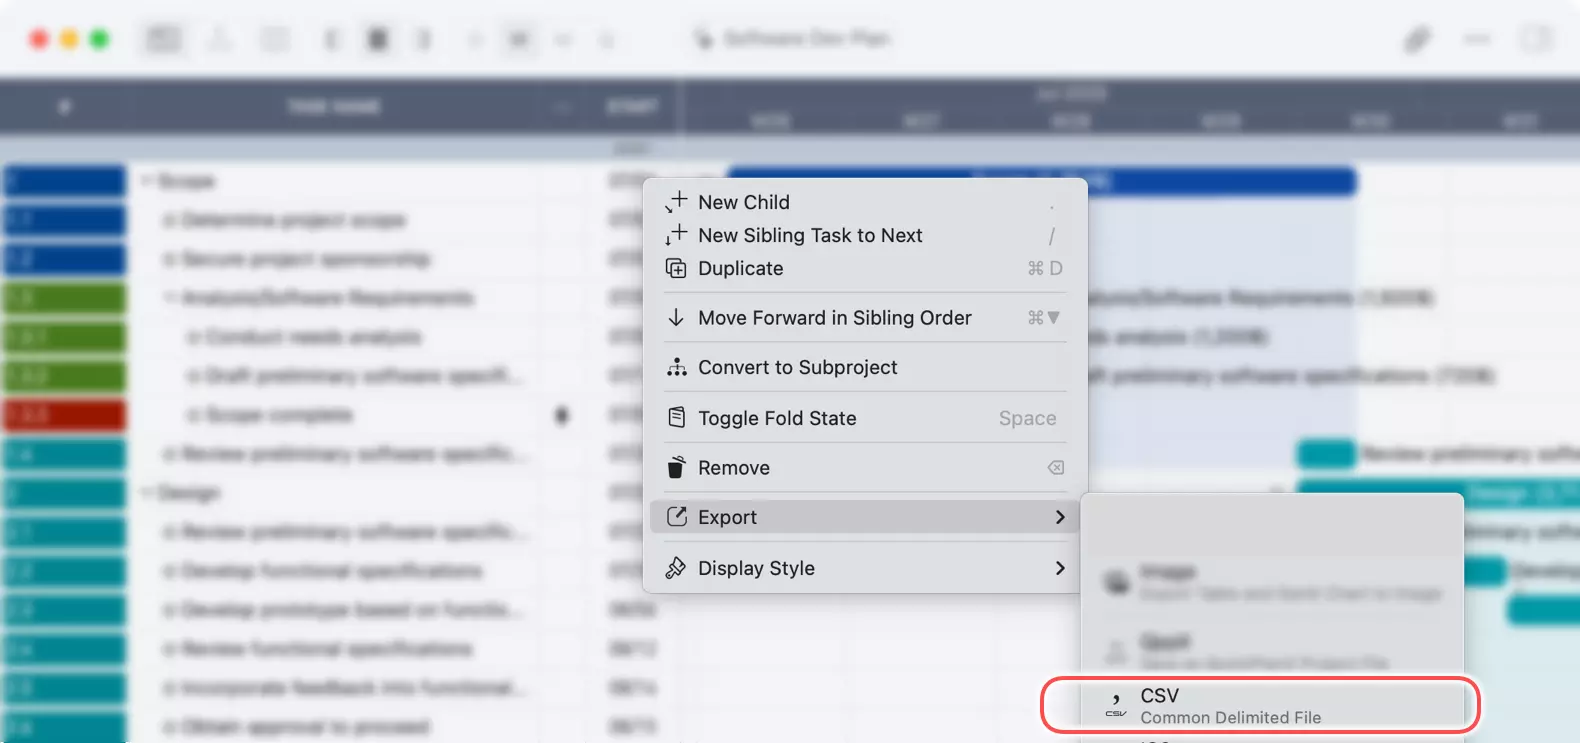
- Select the Branch: Click on a group task or a subproject task that represents the branch you wish to export. If you select the root task, the entire project will be exported.
- Context Menu:
Right-clickorCtrl+clickon the task to open the context menu. - Export Option: Choose
Export→CSVfrom the context menu. - Save the CSV file to your desired location on your Mac.
On iPhone and iPad
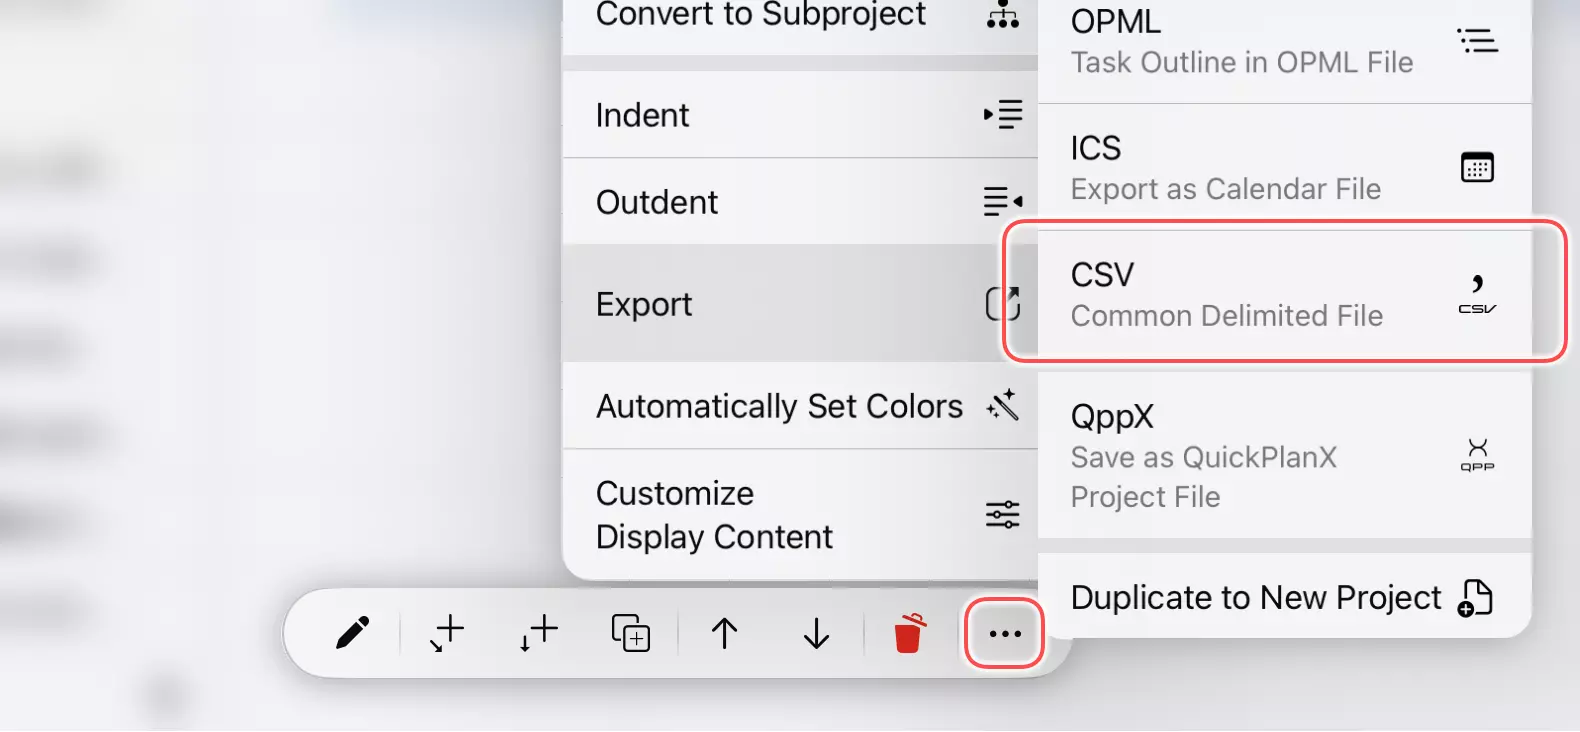
- Choose the Branch: Tap on a group task or a subproject task that represents the branch you want to export.
- Action Bar: Tap the
···button on the action bar to view more options. - Export Selection: Select
Export→CSVfrom the menu. - Save the CSV file to your desired location on your device.
By following these steps, you can quickly and easily export your projects to CSV format, ready for sharing or printing.