Split Task
QuickPlanX supports splitting a task into multiple segments with strong options to customize the output. On Mac, there is a very efficient way to split tasks using mouse clicks.
Via Menu
You can split a task through the menu system across all supported platforms:
Split at the clicked point (on Mac).
- Select the task you want to split.
- Right-click (or Ctrl + click) on the task to access the task context menu
- Choose "Split Task" -> "Split Task at Click Point"
This function does the same as splitting via click described below in this article.
Split into Segments
This option horizontally splits the task into multiple, smaller tasks based on duration.
-
Select the task you want to split.
-
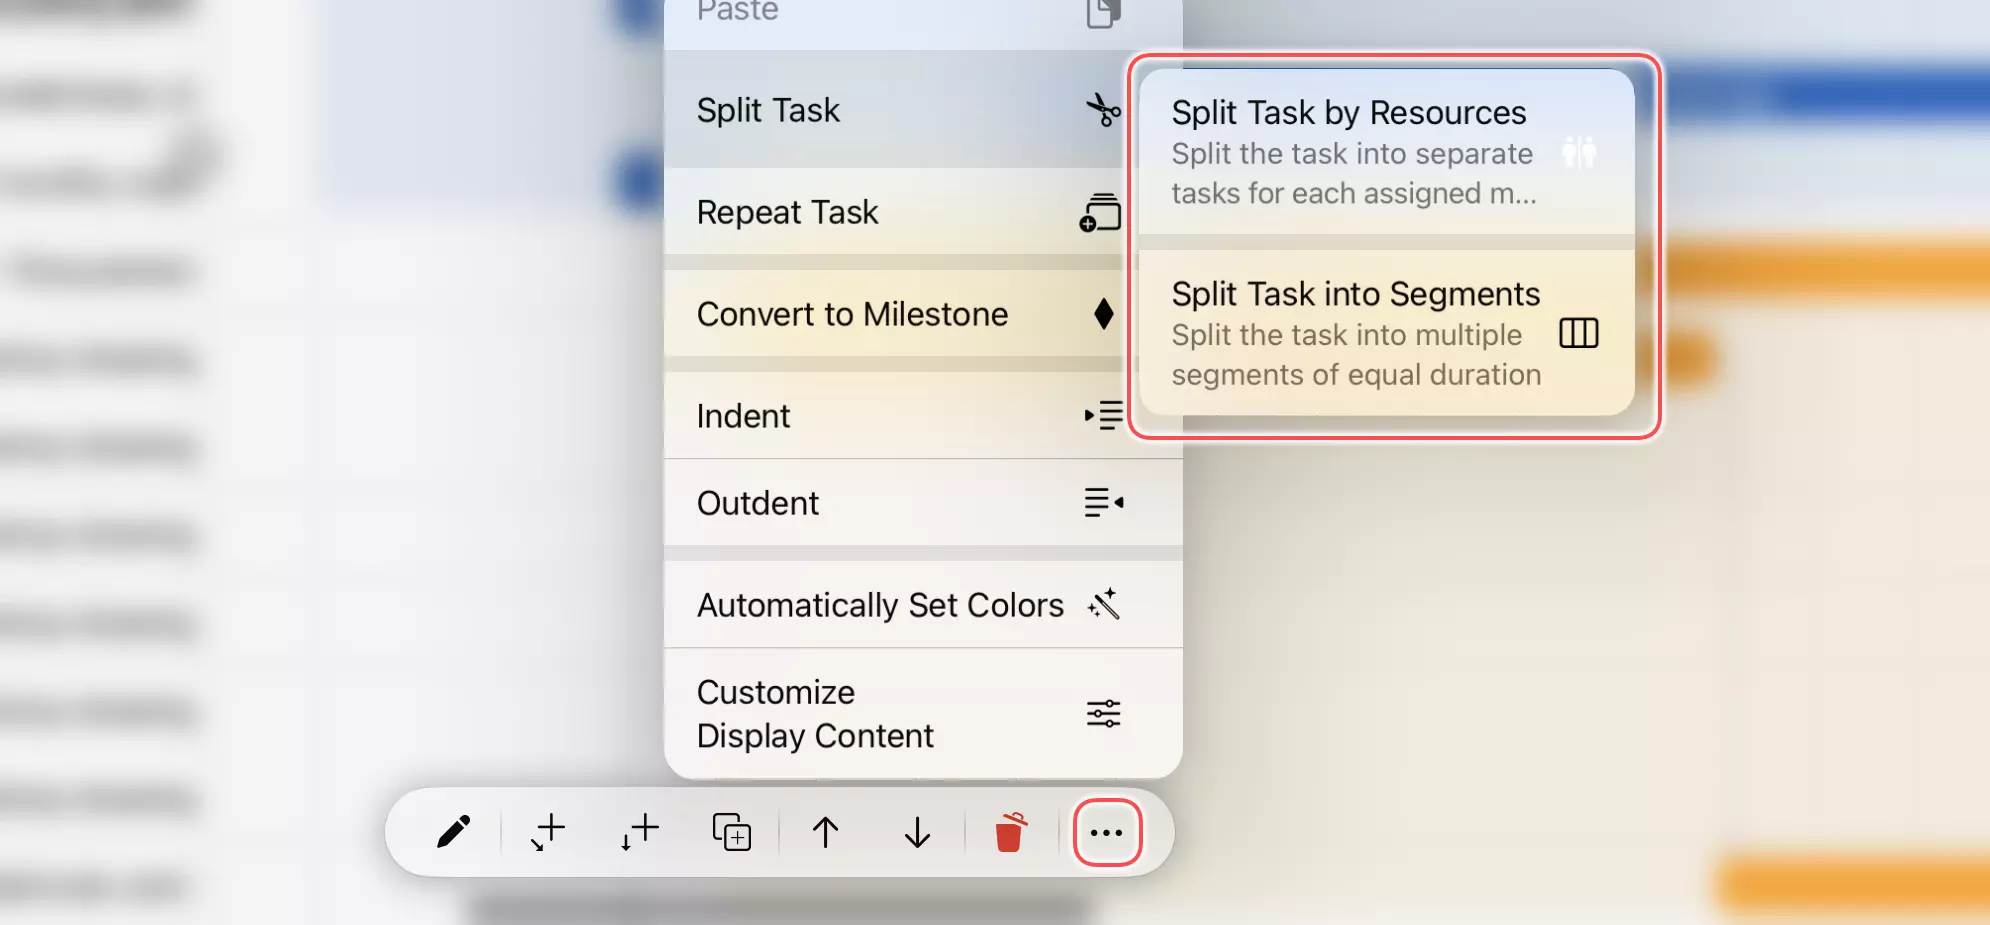
Access the task context menu:
- Mac: Right-click (or Ctrl + click) on the task
- iOS: Tap the "
···" button on the action bar
-
Choose "Split Task" -> "Split Task into Segments"
-
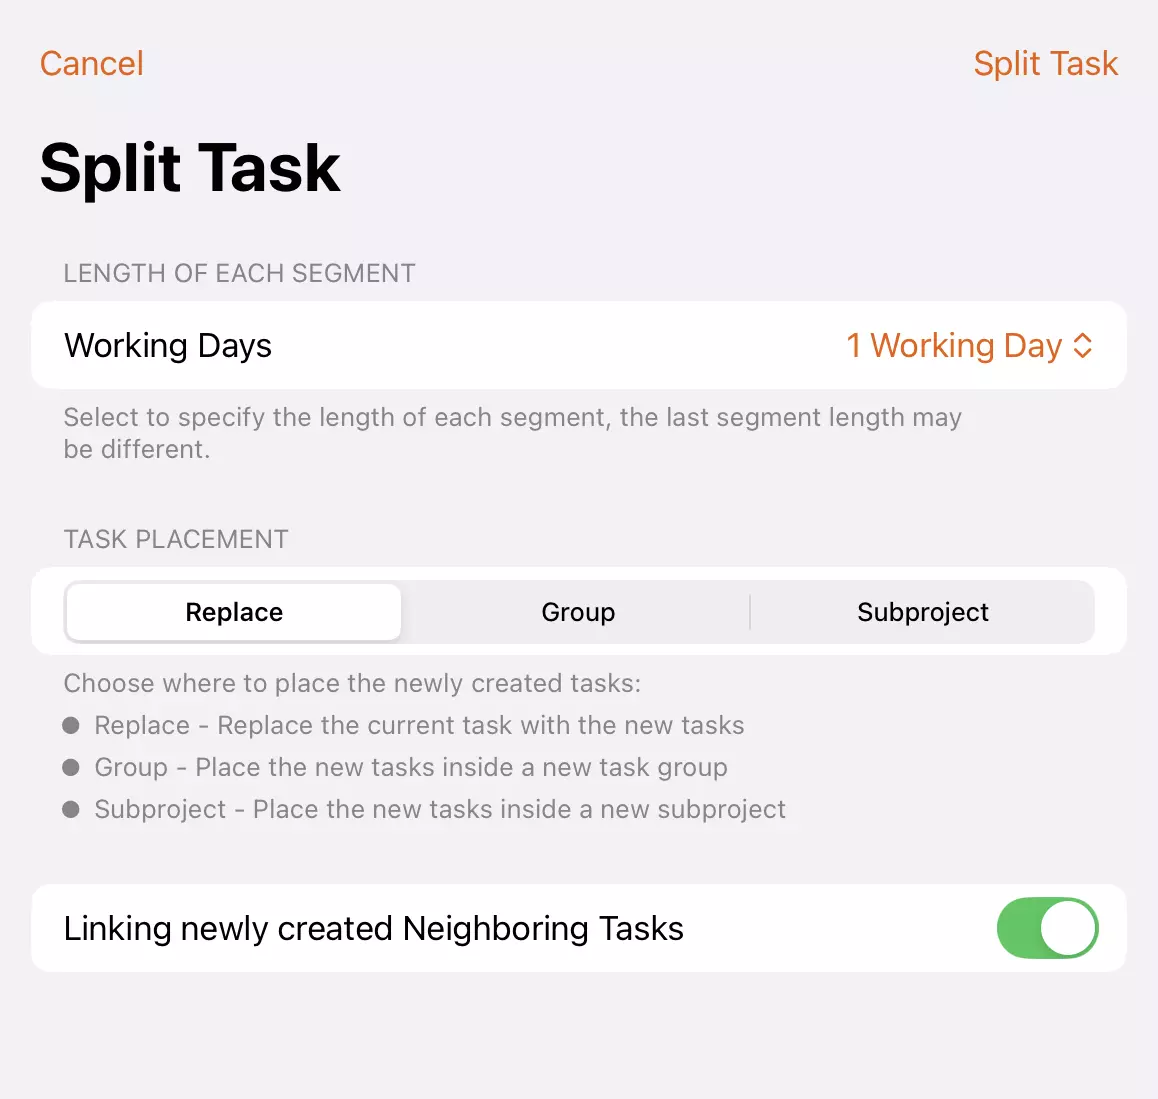
Configure the split settings:
- Length of Each Segment: Specify the duration of each segment. The last segment length may differ from the others
- Task Placement: Choose where to place the newly created tasks:
- Replace: Replace the current task with the new tasks
- Group: Place the new tasks inside a new task group
- Subproject: Place the new tasks inside a new subproject
- Linking New Tasks: Specify whether to link the newly created tasks together
-
Confirm the split to create the new task segments.
The original task will be replaced with the specified number of smaller tasks, each inheriting appropriate properties from the parent task while maintaining the overall project structure.
Split by Resources
If a task is assigned to multiple resources, you can split it by resource allocation. This option vertically splits the task, creating a separate task for each assigned resource.
-
Select the task you want to split.
-
Access the task context menu:
- Mac: Right-click (or Ctrl + click) on the task
- iOS: Tap the "
···" button on the action bar
-
Choose "Split Task" -> "Split Task by Resource"
-
Configure the split settings:
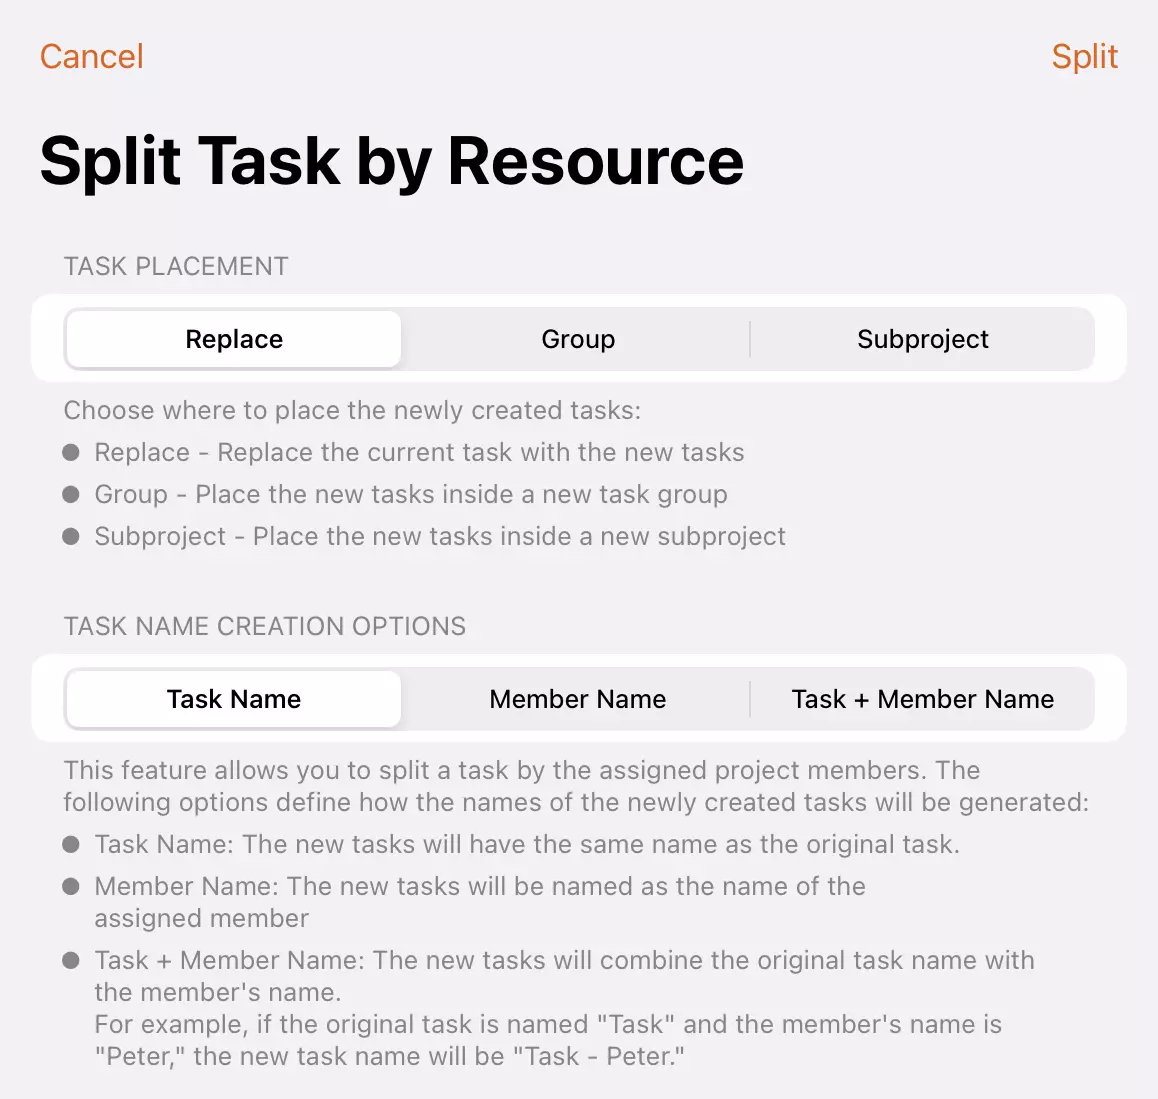
- Task Placement: Choose where to place the newly created tasks:
- Replace: Replace the current task with the new tasks
- Group: Place the new tasks inside a new task group
- Subproject: Place the new tasks inside a new subproject
- Task Name: Specify how the names of the newly created tasks will be generated:
- Task Name: The new tasks will have the same name as the original task
- Resource Name: The new tasks will be named after the assigned resource
- Task + Resource Name: The new tasks will combine the original task name with the resource's name. For example, if the original task is named "Development" and the resource's name is "Peter", the new task name will be "Development - Peter"
- Task Placement: Choose where to place the newly created tasks:
-
Confirm the split to create the new task segments.
The original task will be replaced with multiple tasks (one for each assigned resource). Each newly generated task will be assigned to only one resource, with its working hours and costs recalculated accordingly, while other attributes are inherited from the original task. The total working hours and costs across all new tasks will equal those of the original task.
Assigning a task to multiple team members is common, but it can become difficult to manage when members have different availability schedules. For example, consider a five-day task assigned to Peter and Bob from Monday to Friday, where Bob needs to handle another task on Wednesday and can only work four days. In this case, simply adjusting the resource allocation rate isn't appropriate.
For such situations, you can split the task by resource and organize the results into a subproject, then split Bob's task into two parts: Monday to Tuesday and Thursday to Friday.
Via Clicks (on Mac)
QuickPlanX provides an intuitive click-based method for splitting tasks directly in the Gantt chart view on Mac:
Steps
- Select the task you want to split in the Gantt chart.
- Hold the Option (
⌥) key and position your cursor over the task bar. - Click at the points where you want to create splits. Each click will create a split point.
The task will automatically be split at the clicked positions, creating separate task segments.
Linking Behavior when Splitting
Enforce Linking
To enforce linking between newly created separated tasks, hold Option (⌥) + Command (⌘) keys together while clicking at the split points.
Automatic Linking
If the Command key (⌘) is not pressed, the linking behavior of newly generated tasks depends on the original task's existing relationships:
-
Tasks with existing links: When splitting a task that has links with other tasks, the newly created segments will inherit those relationships.
-
Tasks without links: If the original task has no external links, the separated tasks will remain unlinked.
Be More Productive
This click-based method offers precise control over where splits occur and enables quick, visual task splitting without navigating through menus. Familiarize yourself with this technique—you may find it significantly boosts productivity in certain scenarios, as demonstrated in the video below.